Apothecary Jars.
Anyone whose decor obsessed has heard of these before. You either have them already or you've been dreaming of them like me. I'm honestly not sure where apothecary jars originated from, but I know that Pottery Barn had a line of them, and as far as I know, that's when they got really popular. They have this crisp clean, expensive feel to them that everybody wants. Wether you use them in your bathroom or your kitchen, for candy or cotton balls, they are versatile and stylish.
The problem with these popular decor jars is that Pottery Barn charges, like, an arm and a leg for them. I saw on Pinterest that people were re-creating these apothecary jars in a ton of different ways. So, of course, I chose the most inexpensive method. The Dollar Store. Duh.
Alright, i'll stop rambling. Read on dolls...
1.) Supplies

I had to return to The Dollar Tree like THREE TIMES before I could finally get my hands on one of these vases. For this project, a particular vase is required in order for the lid to fit correctly. You will need to get a vase with a flared rim. If you can't seem to find them in store...you can buy them online here!!
As for other supplies, you'll need the lids. You will find these in the kitchen section of the store. They are glass sauce bowls. Small bowls you would use for something like a side of ranch or salsa. These shouldn't be hard to find and they come in packs of three or four. Then grab yourself a candle stick holder from the candle and vase section. The only things that I didn't get from the Dollar Tree were the Epoxy Glue and the drawer knob. I had the glue on hand and the dresser knob is from Hobby Lobby. It was about $2. The ruler and the marker are used for marking the center of the lid and the center of the bottom of the vase, which we will go over in the next step!
2.) Mark Your Center


Okay, so in these pictures you can hopefully notice a small silver spot on the center on the item. The top photo is of the bottom of the vase and the bottom photo is the top of the lid. The reason we mark the center is so we can place the candle stick holder and the dresser knob on the center points so that they don't come out lopsided.
The best way to measure the center is mostly common sense. Just measure across and mark the center then measure vertically and mark the center. Line your markings up for the center most point of your item.
3.) Glue The Lid & The Stand


I didn't take pictures of the gluing process because, well, it's that simple. Just put your Epoxy Glue on the top rim of the candle stick and place the vase, centered, on top. I used a toothpick to be precise with the glue but it does dry clear so don't worry too much if it's a little messy. Place something heavy on top of the vase to seal the glue and let it sit for about 5 minutes. As for the knob on top, just repeat the glue process and place it on the center of the lid. Let it rest for five minutes and you're done!! Its literally that easy guys.
I used mine on my vanity...which we will be talking about in my next post ;) They hold my cotton balls and my Q-tips. This makes it so much easier when I'm getting ready in the morning and getting ready for bed. They are easily accessible...plus, they are so pretty to look at!

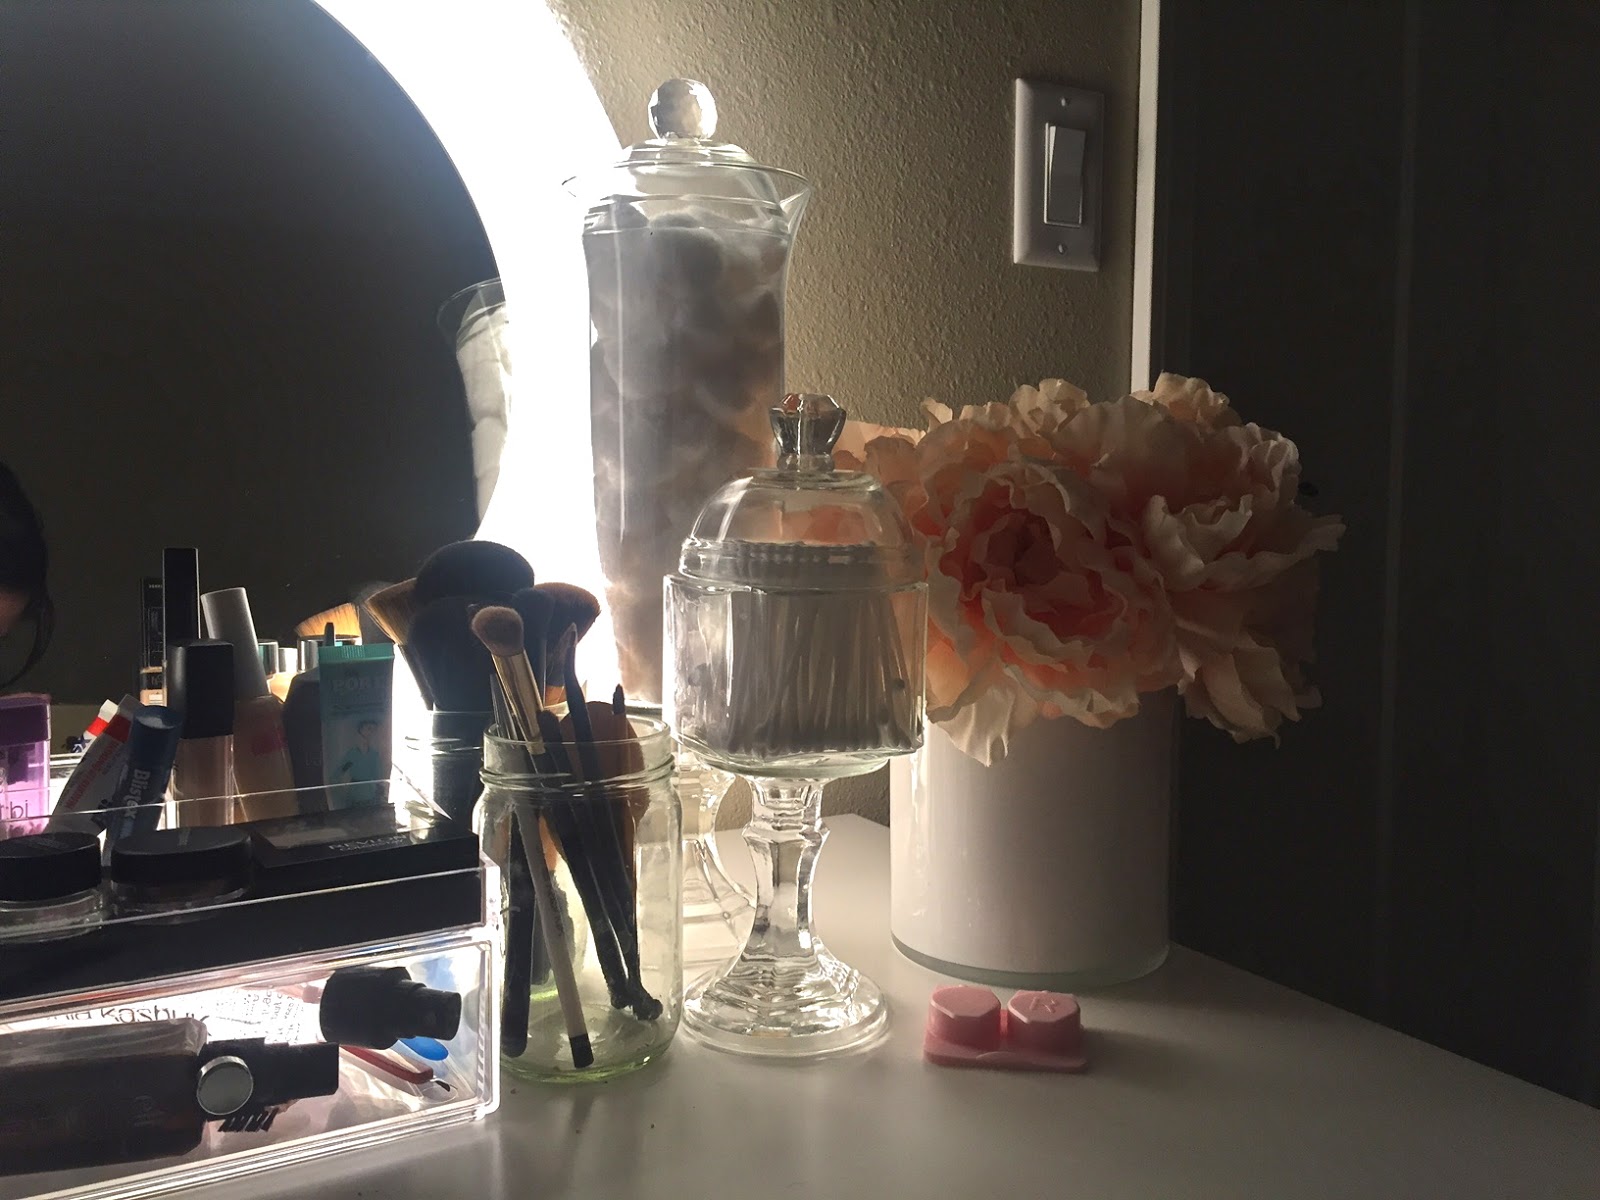
P.S. The jar holding my Q-tips is actually an old cotton ball jar I had in my bathroom. I replaced it's lid with one I made (the same lid we created for this tutorial) and added a candle stick! I encourage you to look around your house and try to find items you already have that you could convert like this. It's the most cost effective way to create new decor for your home!
I hope that you guys enjoyed this post! Leave a comment if you have ever done something similar and send me pictures of your version! I'd love to see your ideas!
Thanks so much for reading. Keep an eye out for my next post on my new vanity!
Until then, don't forget to subscribe via email (we never spam!) and follow me on social media!
Instagram: thecaliforniacupcake
Pinterest: Shannan Gladwin
XO.


